Assignment 4: Creating a document

Photo by Cytonn Photography on Unsplash
Something from Nothing: Assembling Your First Documents with Docassemble
We have already explored ways to show text to the user, from our very first Hello, World exercise.
We can create documents using the same method. We need to learn about a new specifier first:
the attachment specifier. You can read more about attachments here, or check out the official documentation.
Example
Let's demonstrate a simple interview that assembles a Hello, World document.
We'll use a few new specifiers: the attachment specifier, and a few options that fall underneath it to control the name and content of the document we create.
Let's take a closer look our sample interview. As a reminder, instead of a standard variable name, we're using an Individual object to store the information about our user. We use the objects block to create our client object.
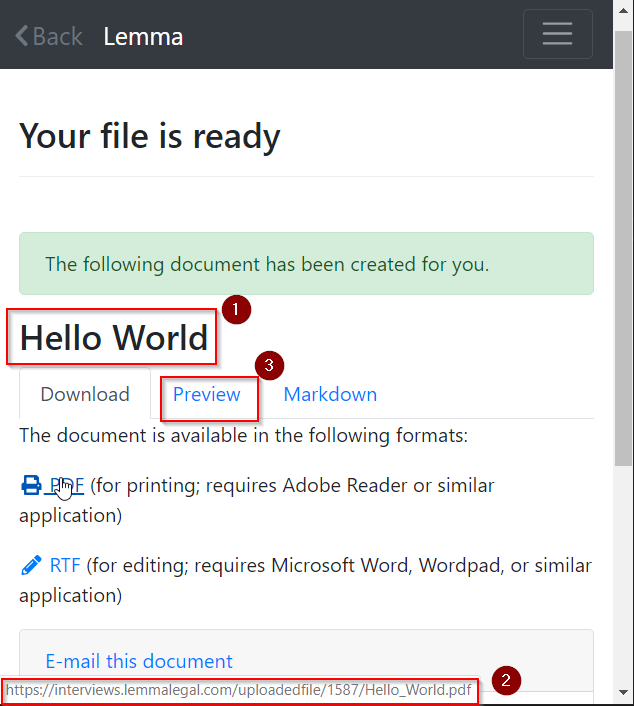
The only new feature of our interview comes in the attachment specifier at the end. Notice we have three options indented below the attachment specifier:
name: A descriptive name that is shown by Docassemble on the screenfilename: The filename that the user will download (we don't need to include .pdf or .rtf)content: the actual text that the document will contain, which can include Mako + Markdown. If we click the "preview" link, we can see a preview of the attachment.
Here's how those options will appear on the screen:
Docassemble also offers us an option to email the completed document.
Putting it into practice
Amnesty International uses international letter writing and other pressure campaigns to get governments around the world to release "prisoners of conscience". Let's write a tool that might help someone write letters more efficiently.
Our letter will request the release of Dr. Martin Luther King, Jr. from the Birmingham jail.
In addition to the attachment specifier, we introduce two new kinds of screens:
- The
areainput type - An information screen with a continue button, which uses the specifier
field - A signature screen, which uses the specifier
signature
Let's start with some working code. We'll modify this to improve it.
Assignment
- Change the file name of the letter to be more descriptive
- Add a yes/no question to the interview that prompts the user about whether they live in Alabama. Look back at assignment 3 for one way to add a yes/no question using the
fieldsspecifier. You could also use yes/no buttons. - Add an optional paragraph using
% if ...:and% endiftags that only displays if they live in Alabama. For example, it might say "As an Alabama resident, I am disappointed..." You may want to review the section in Mako on conditional text. We also used conditional text in Assignment 1.
Turning in your work
Download the final YAML file and copy the link to run your interview. Upload to Blackboard.